
ORC Week 8, Part 1: The Playroom Reveal!
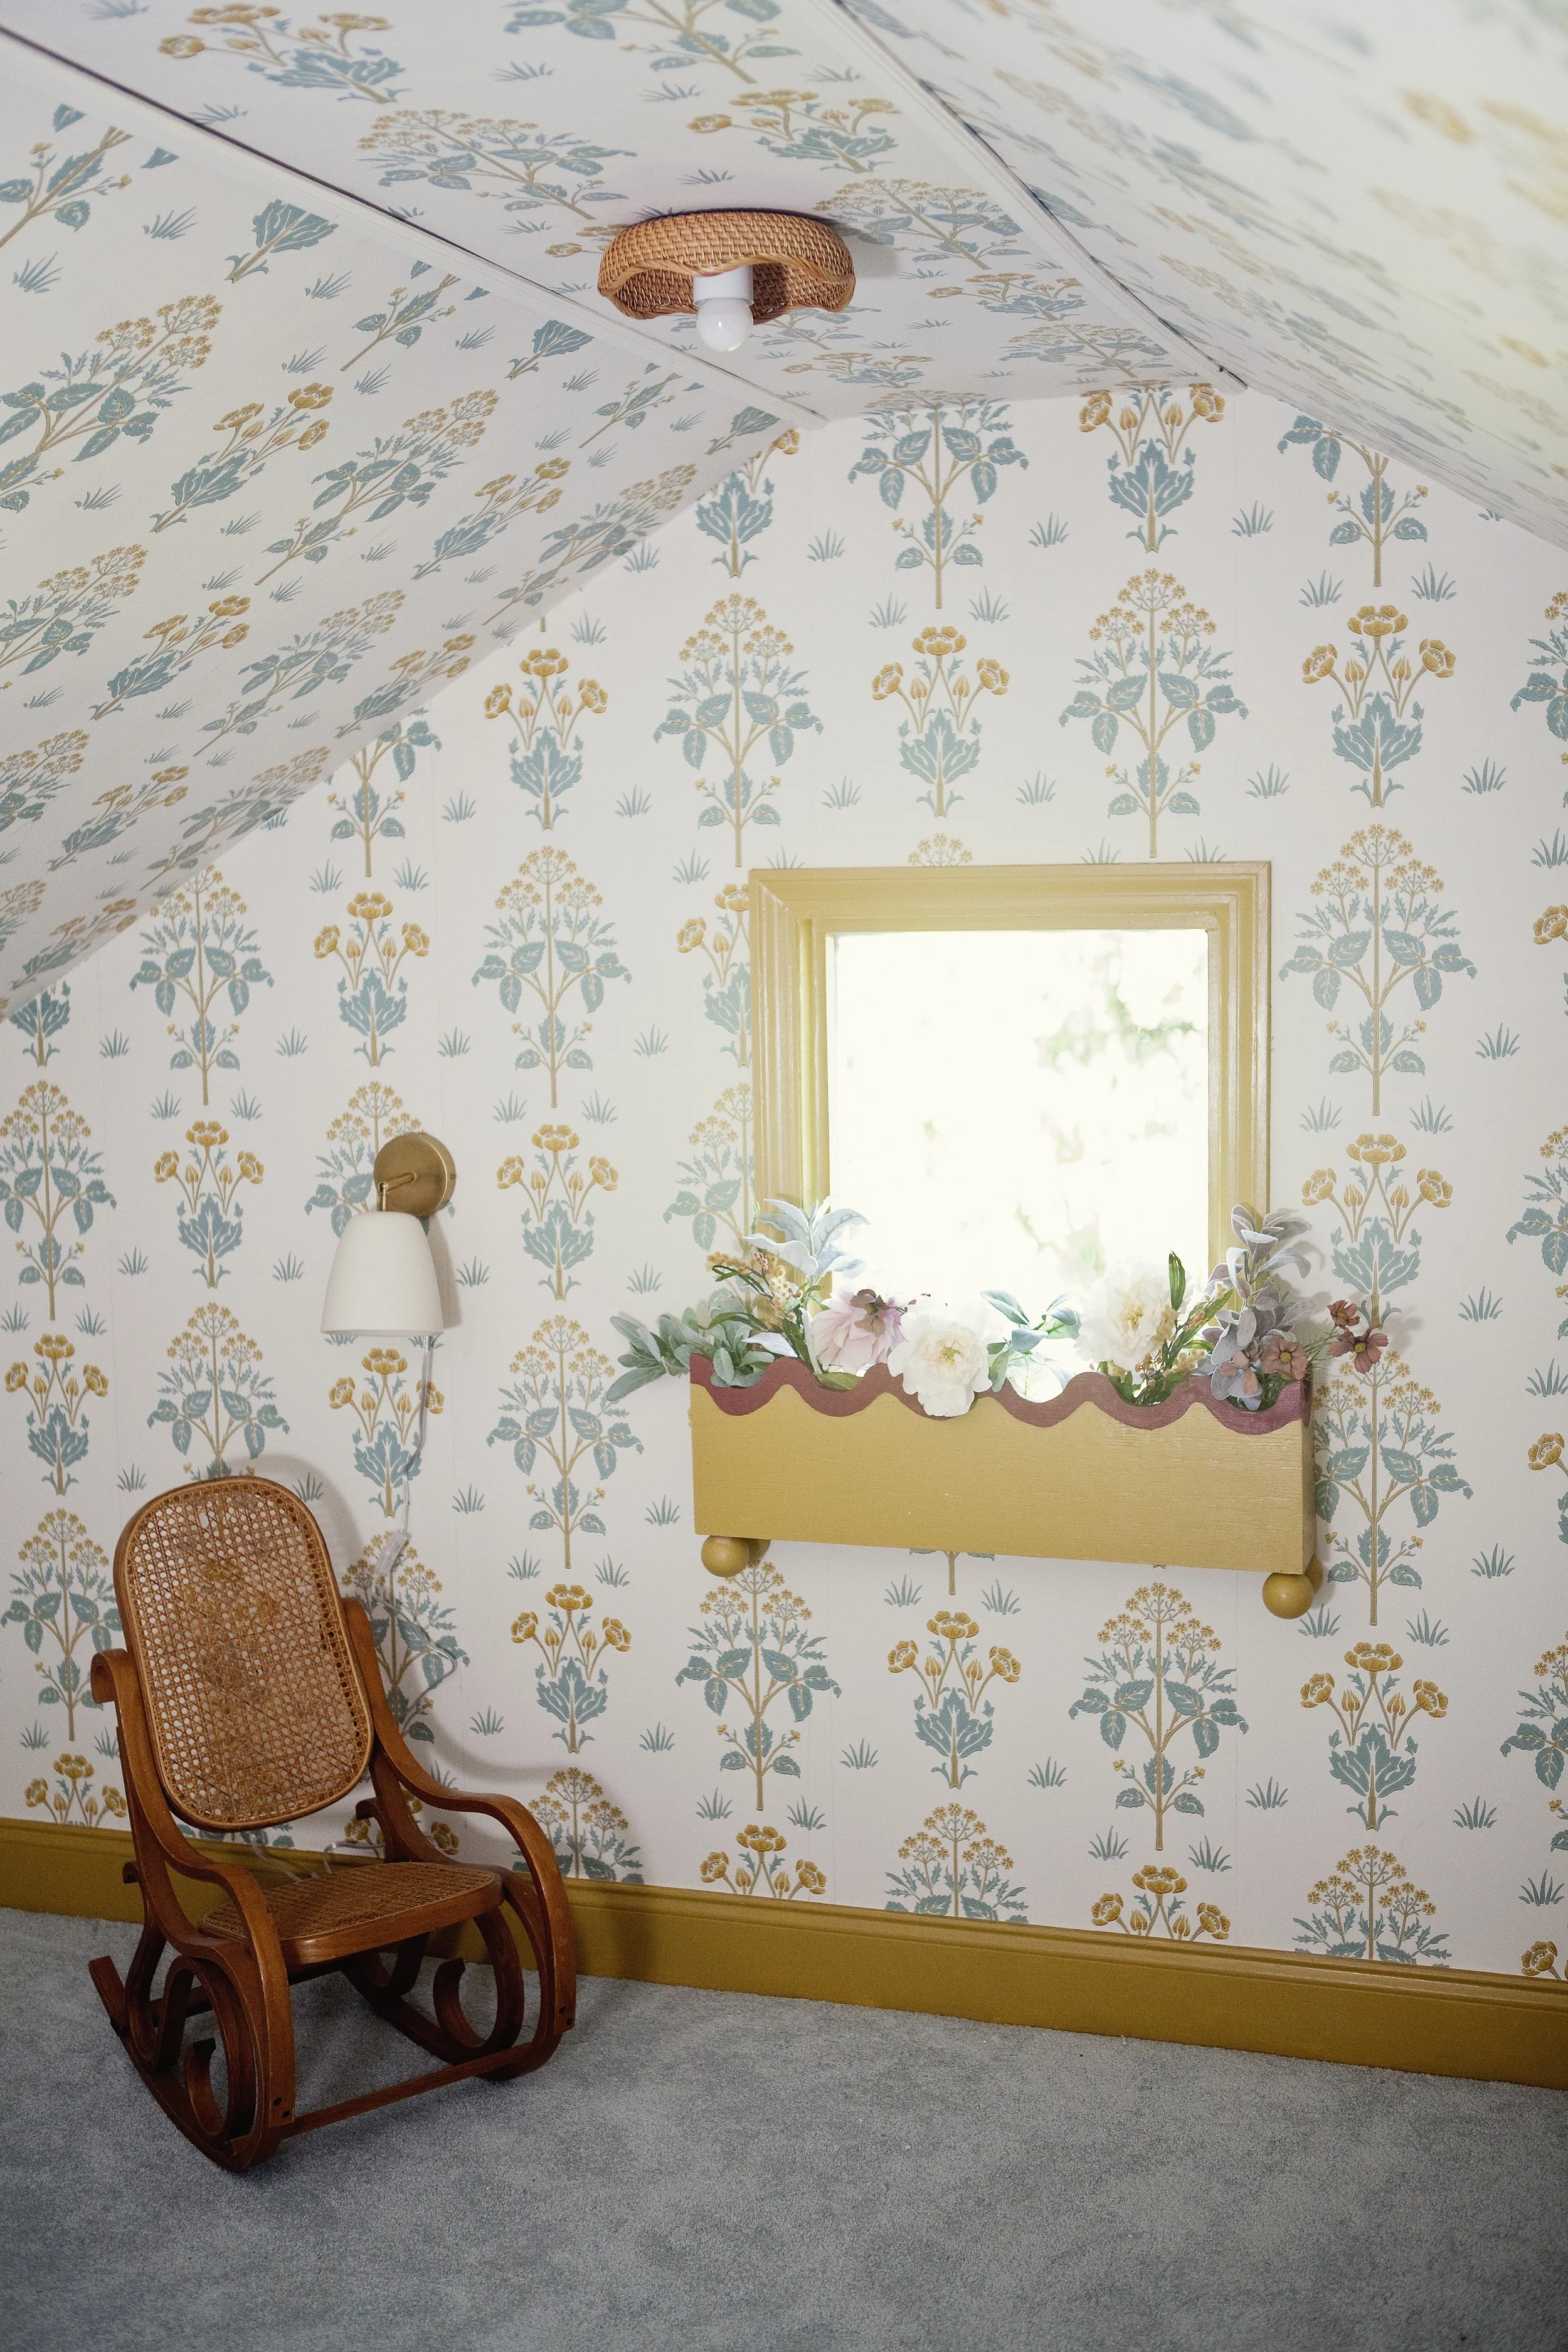
Photo by Jenny Sherouse
After 18+ hours of wallpapering, dozens of hours nailing, screwing, and sanding wood, and several necessary curse words at 2am, I’m THRILLED to share the results of our spaces. After ten years of marriage and dozens of DIY and home projects, this one was the first one we’d attempted to complete on a true deadline. I figured we wouldn’t make it, given our responsibilities as parents and his full-time job. But it felt like writing a paper due the next morning for class. Sometimes you just need that looming deadline to light a fire under your ass.
After surviving what we survived last year with the Pivot House not working out, it feels so unbelievably satisfying to come up with a creative vision, bring it to life with my own eyes and hands, and then know that we’ll be reaping the benefits for years to come. If Instagram and the internet went away tomorrow, I have no doubt I’d still design and decorate these spaces for our family to enjoy. I love that these rooms are SO MUCH more functional because of storage that allows us to organize and stay organized. And the fact that they’re beautiful to look at? It’s icing on the cake.
Over the next few weeks I’ll dive into the various DIY components through both the playroom and the closet. We handcrafted virtually everything you see that’s structural, including decorative arches, sliding trellis doors, a window box, basket lights, and a fully custom closet with drawers and cubbies for storage. And tomorrow I’ll share the second room we somehow finished: my daughter’s closet.
First, a reminder of where we started:
BEFORE

AFTER
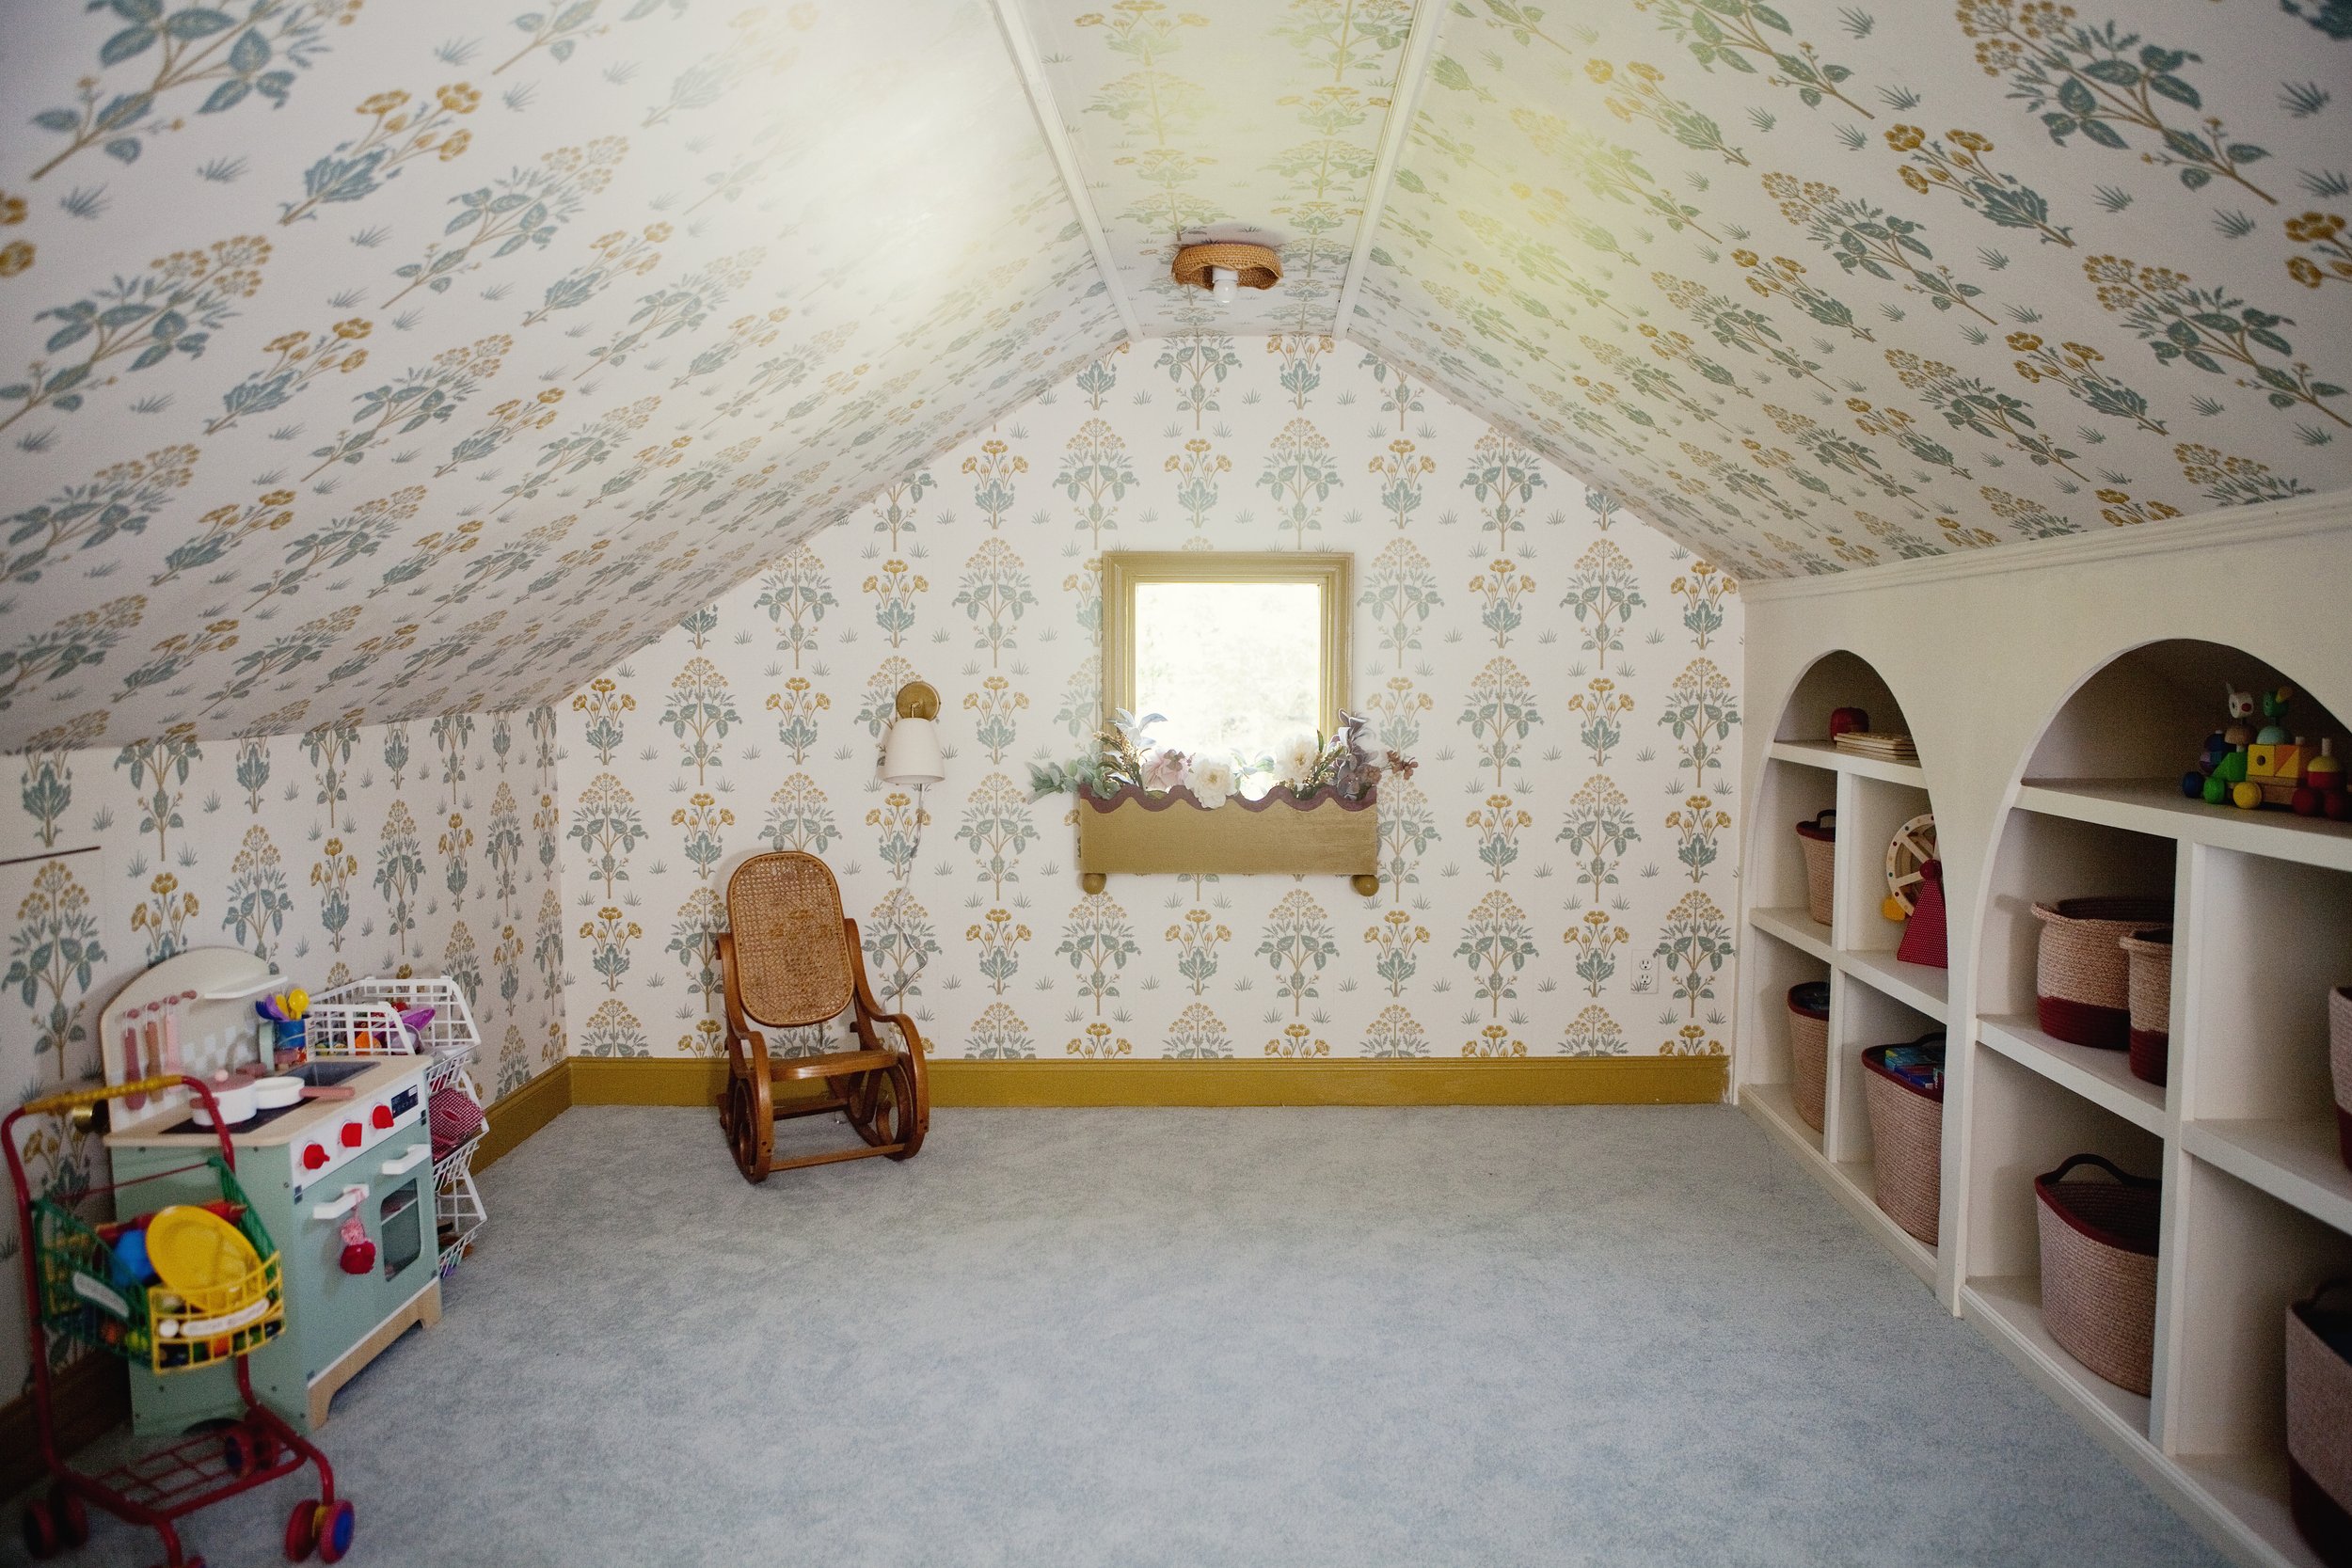
Photo by Jenny Sherouse


Photo by Jenny Sherouse


Photo by Jenny Sherouse


Photo by Jenny Sherouse
Wallpaper:
The entire design of the space was sparked by this gorgeous wallpaper by William Morris and Co. I’d ordered a sample of it when designing the first version of the Pivot House (if you’re new, feel free to catch up here and read the subsequent posts). I loved that it felt traditional and timeless, but in a fresh color palette. It certainly was the splurge of the room, but since we didn’t buy any furniture for this space, it felt worth it. I love the spearmint green + ochre color combo, and the fresh off-white background felt ideal in a room with very little natural light. If I had my ways and a million dollars, I’d also add skylights in here. But until then, some beautiful wallpaper will do. I love that it’s happy and playful and feels right for my pair of flower-loving-but-not-overly-feminine girls.
Painted trim:
Once you go paint contrasting trim, I don’t think you ever go back. Long ago, contrasting trim was the trend. And then at some point over the past few decades, people collectively went all white with their ceilings and trim. I think a small part of our color-craving brains must’ve died inside. Also it’s a clever way to direct the eye to certain parts of a room you like and away from structural imperfections. In our case, we painted the baseboards and window trim to draw the eye downward and away from the many ceiling irregularities. When previous homeowners converted this room from an attic to a play space, we believe they were sloppy with the drywall installation. And since we weren’t going to remove any drywall in here, we did our best to trick your eye away from the mess.
So how did I decide on the polarizing ochre color? It was a really tough selection. I tried a few brighter yellows, but they didn’t read well in the low light. It certainly was a risk, but it’s one of my favorite parts of the room and I particularly love it paired with the crisp white walls in the stairwell.
Arched open storage:
The existing shelving in this space was lackluster to say least. But we also didn’t want to totally rip it out. So we decided to enclose the practically useless top shelf behind an arch that would bring beauty to the shelves. We added a 6th set of shelves to the end for symmetry’s sake and then cut the arches out of 3/4" plywood sheets. We used a handful of very helpful products to close gaps and holes (more of those later), as well as trim pieces to make the shelves appear custom. It might sound simple but I can assure you it was not. I’m honestly amazed at how these turned out. And then I found a bunch of rust-colored baskets at Home Goods to unify the palette and store everything away when not in use. They won’t stay perfectly sorted forever, but after nearly six years of parenting, I know open, soft baskets are the best way to hide crap but keep it within kids’ reach.

Photo by Jenny Sherouse
Flower box:
This idea was sparked by two other ideas combined into one. Early in the summer, I spotted a flower box at a local kids’ museum on the outside of a playhouse. And then in July, on a trip with Andrew to Portugal, I spotted a trio of metal tables I absolutely loved. They were mint green with wavy top edging. Since I couldn’t fit them in my suitcase, I was determined to bring that look home somehow. The balls at the base up the playful factor and make the flower box feel like a piece of furniture with legs. I’ll be sharing the inspiration photos and a tutorial on how we built them soon.

Photo by Jenny Sherouse
Lighting:
The lighting was dismal in here, which was a problem given the lack of natural light. So the first thing we did was use a recessed light converter kit to make them flush mounts. I went down a long road of figuring out the best flushmounts and basically determined I couldn’t find anything within budget that would get here on time that I liked. I was also trying to avoid fixtures so large that adults would hit their heads. I remembered DIY rattan sconces here, which gave me the idea to use baskets to get the same effect. All three needed to match and not take too long to arrive, so I was thrilled when I found some on Amazon with a wavy edge (it picks up on the flower box edge). I paired them with a white flush mount kit and screwed in short little light bulbs. Aren’t they adorable? I love that the lines mimic the flower box edging as well. I also added a simple plug-in wall sconce from World Market for additional light.

Photo by Jenny Sherouse
Costume closet with sliding trellis doors:
The top of the stairs in this space was a total dead zone, so we came up with the idea to use it as a closet. We have a growing costume collection and this felt like the perfect spot for it. Could we have added fabric curtains and called it a day? Of course. But I hadn’t found fabric I loved and also don’t sew. We landed on sliding doors with recessed hardware, and then decided to accentuate the floral theme with trellis. I loved the idea of painting the back wall in the same ochre paint color, really making it pop behind the white trellis.

Photo by Jenny Sherouse
Seating:
How many times are you in a playroom and there’s nowhere comfortable for adults to sit? So we decided to bring in a vintage floral loveseat I purchased secondhand a few years ago, which adds a playful pattern-on-pattern look. Andrew isn’t crazy about it, but I’m a fan. We could always recover it. And that thrifted mini bentwood rocking chair is a family favorite.
Stairwell gallery wall:
Giving transition spaces a sense of purpose makes a house feel like a well-decorated home. And I love a personal and playful gallery wall of family photos and kids’ artwork. Everything here we already owned or I quickly printed out to frame, and I just picked up a few additional frames at Target the night before the shoot. I’m planning to add command strips behind each frame to make them extra secure. Can’t you just picture future sleepovers and the sound of kids wildly running up and down these stairs? As for the space below, I’ll be sharing it tomorrow. I might even love it more than the playroom!

Photo by Jenny Sherouse

Photo by Jenny Sherouse