
A Little Laundry Room Makeover
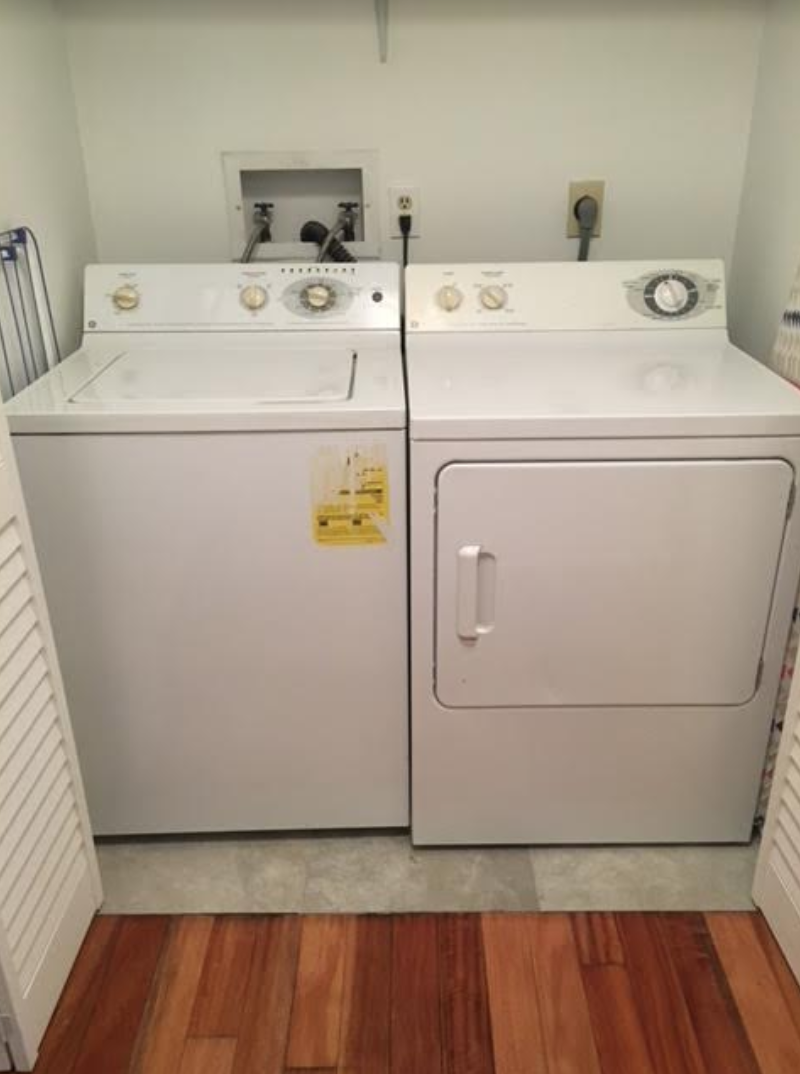
BEFORE
AFTER

If we're being honest, making over a laundry room is a total extravagance. For the first 10 years of my post-college life, I had no washer/dryer to call my own. Like most young urbanites, I schlepped overstuffed bags of clothes to and from laundromats and dingy apartment basements as part of my weekly exercise routine.
It's true that laundry rooms are spaces often unseen by the world. But I don't care who you are: a nice and neat laundry room can truly make the whole experience feel a little less chore-like.
Our laundry "room"—and by room, I mean large closet—sits right off of our dining room in the hallway leading to the master bedroom. When my husband Andrew and I first moved into the house, a pathetic little curtain hung above the space concealing an old washer and dryer and a sagging upper shelf that could barely support a detergent bottle. But given our laundry list (ha) of house projects, fixing up this space fell to the bottom.
About a year ago—as an attempt to muffle the terribly loud washing machine sounds and replace aforementioned sad curtain—my husband installed two sets of folding doors with matching trim. I meant to take pictures of that process, but that was in my B.B. days (before blog). It helped, but not enough. When big appliance Memorial Day sales rolled around, we finally splurged for a new stacking washer and dryer. They looks so neat and clean that the rest of the room needed to match. So here's what we did, step by step—all for under $400.


1. WALLS: This was our starting point. To give the plain space some pizzazz, we applied gold speckled removable wallpaper from Target. The pattern was light and cheery, plus it was affordable ($30 a roll and we used 4). Now, this was not our first rodeo in removable wallpaper land. We had our first go of it in our Chicago apartment, which led to a big blowout fight about whose method was best. We only *mildly* argued this time. Removable wallpaper can be intimidating, but if once you get the hang of it, the process should go relatively smoothly. A few things to note:
*A plastic putty knife and a box cutter are super helpful when you get to the trim.
*Picking a pattern that doesn't need to match up exactly is super helpful. Otherwise, you'll want to make sure the first panel is level at the top and then match the next panel up to it. Most walls aren't perfectly even, which can make it extra frustrating. Just pick one panel to be straight and expect everything else to follow. No one will be analyzing it as much as you.
*This paper functions like a strong sticker. You can remove it and smooth it back in place multiple times in a row. So don't worry if you keep messing up.
*Some people recommend going slow, but I found that big sweeping motions in a relatively fast motion worked for me (as seen below).
2. CABINET: Our kitchen cabinets—which are visible from the closet—are from Ikea, so we thought it'd be best to be consistent. Ikea's 3-D planner is super helpful because it allows you to upload dimensions of your space and creates a rendering to follow when purchasing your design. We went with the SEKTION model with two drawers: the top to hold laundry products and the bottom for dog food storage. We also bought a toe kick and a side panel to fill up extra space on the sides and base, and screwed in the same matte black drawer pulls we used in the kitchen to create a cohesive look. Didn't take photos of this process because we've all seen how ugly it is to put together Ikea furniture 😂 Total cost: $240
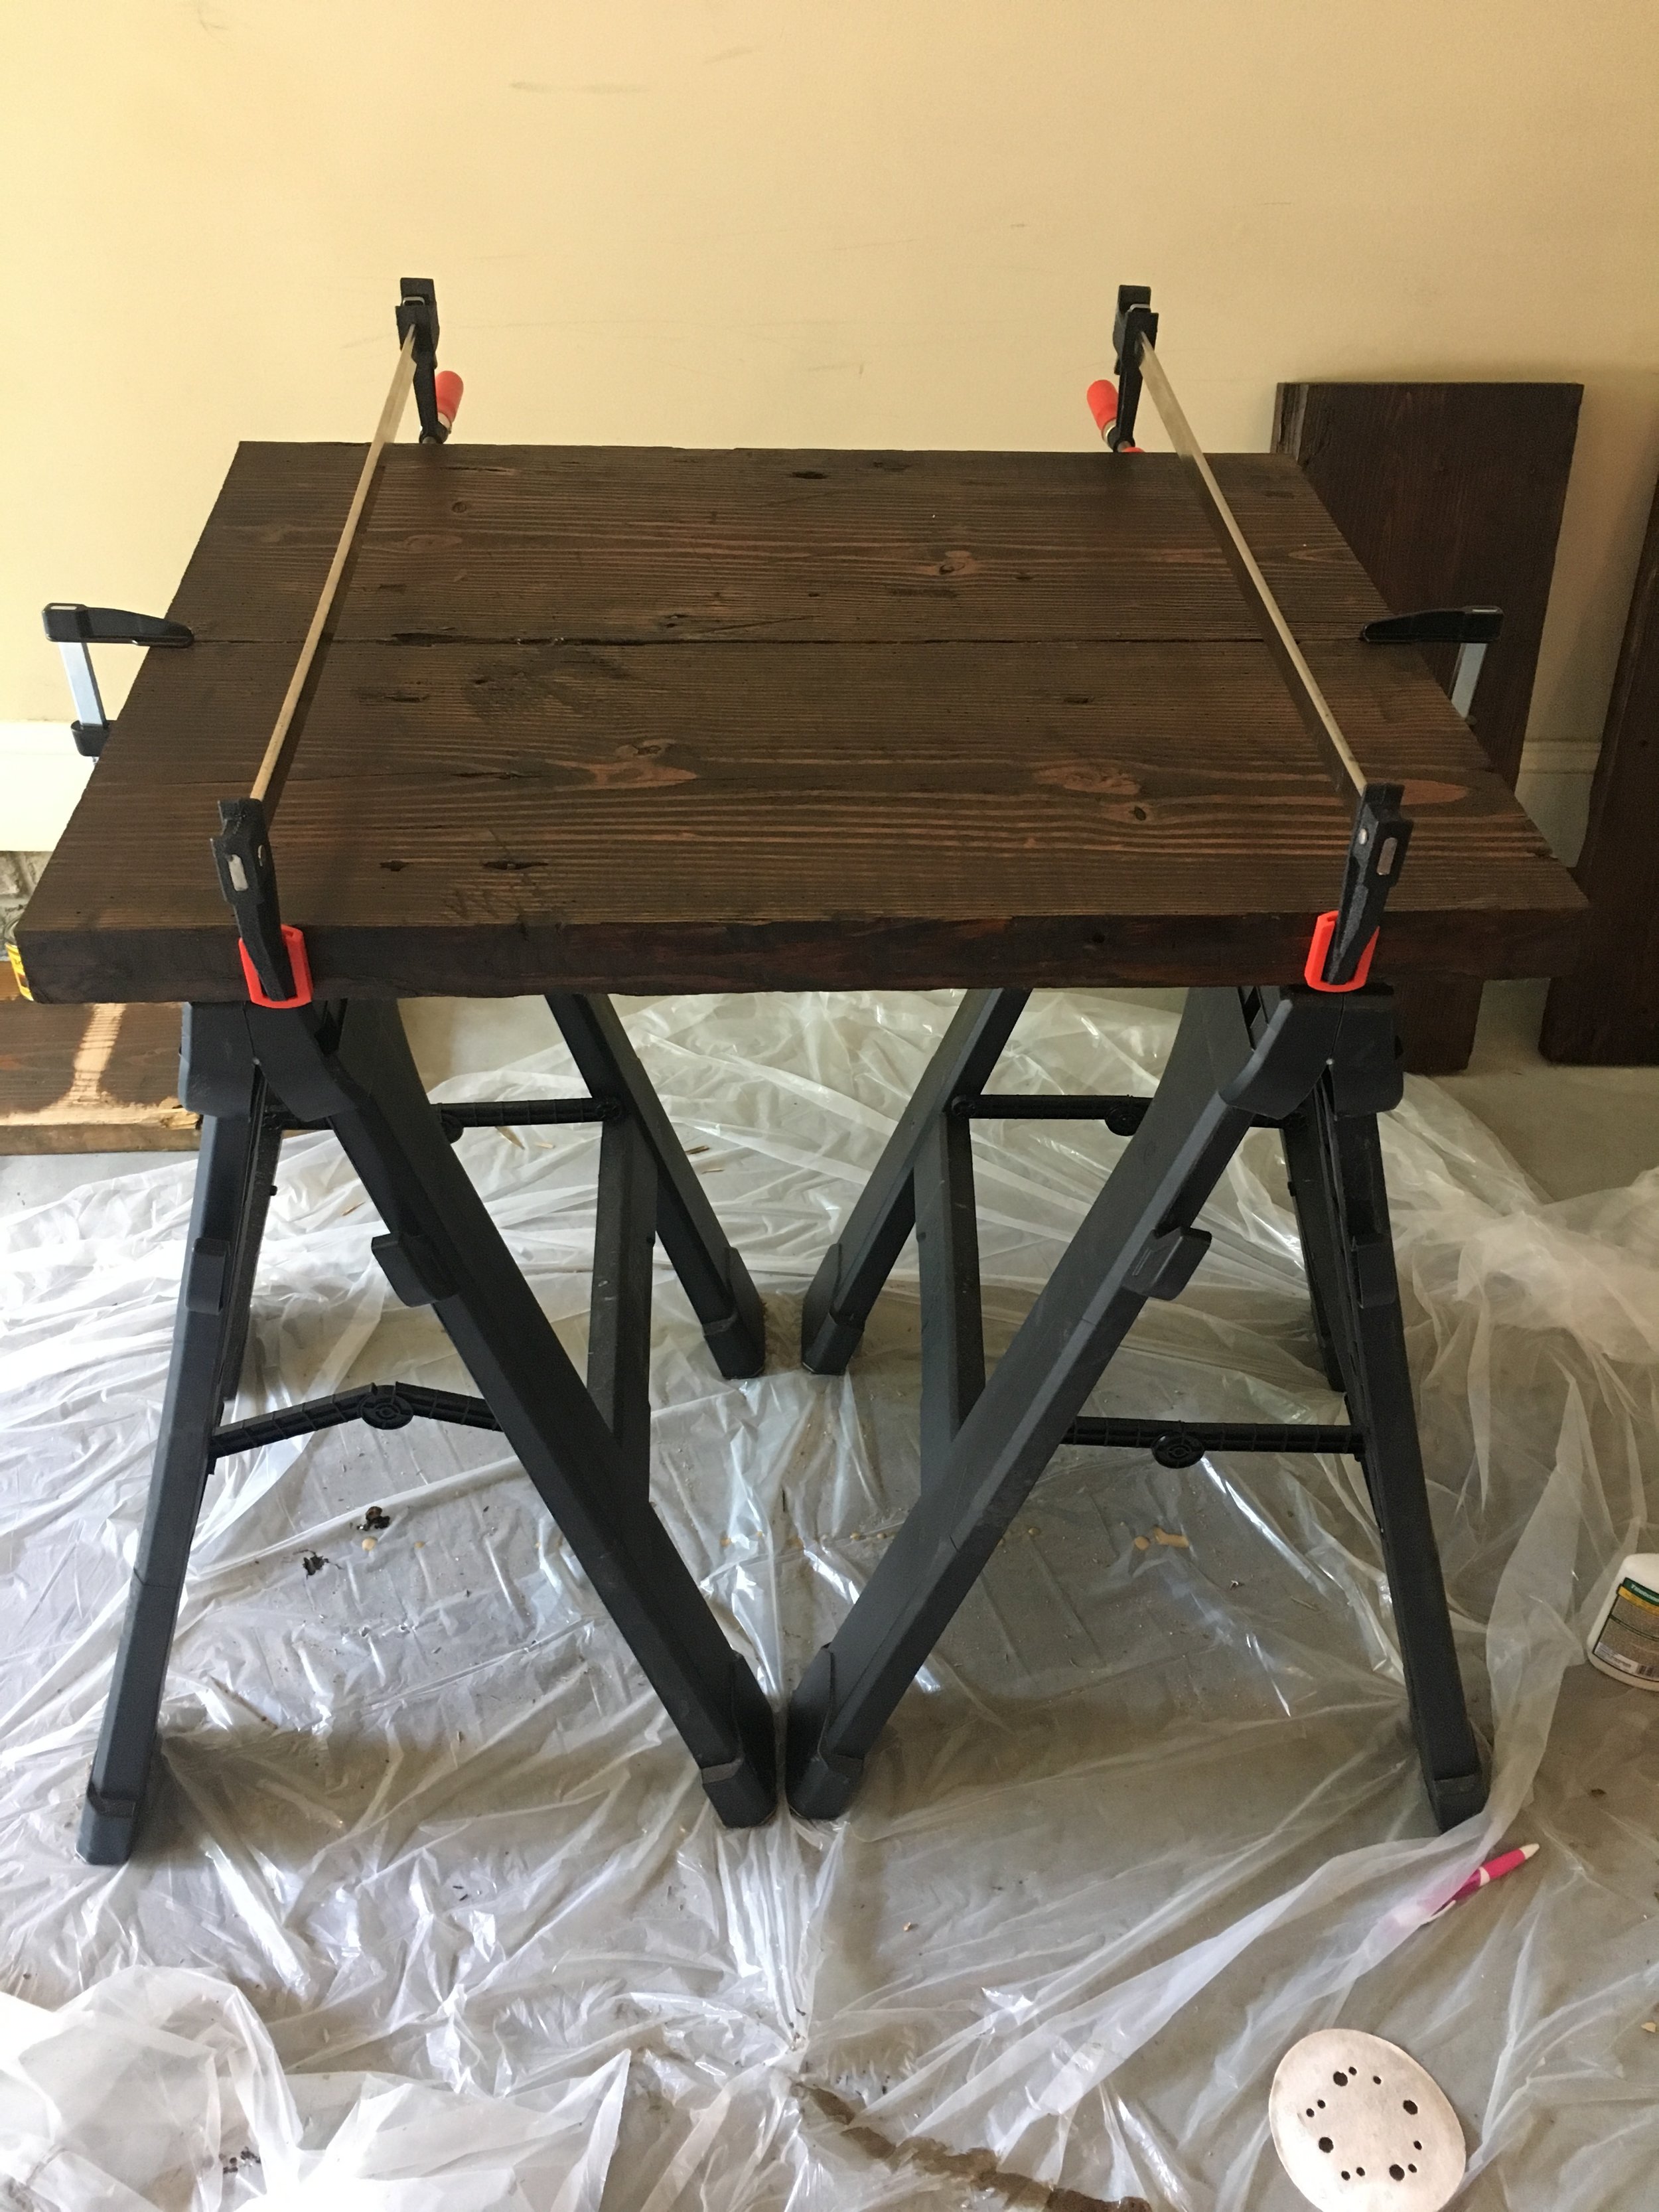
3. RECLAIMED COUNTERTOP + SHELVES: This is my favorite element of the space. We found a $40 piece of cedar at the salvage yard that was taken from an abandoned house in our town. We had it cut down to fit our measurements for $2 a cut. Once home, we tested out a few different stains on the wood before picking a color that worked best with a custom bar in our kitchen. Using wood glue, we glued two of the boards together for our countertop, and held them in place with clamps while they dried. The stain actually set deeper than we intended, so after the glue dried, we sanded the boards down a bit before sealing them with polyurethane. We installed the countertop to the cabinet with screws from underneath. I love how the wood grain and imperfections show through the stain and add tons of character.


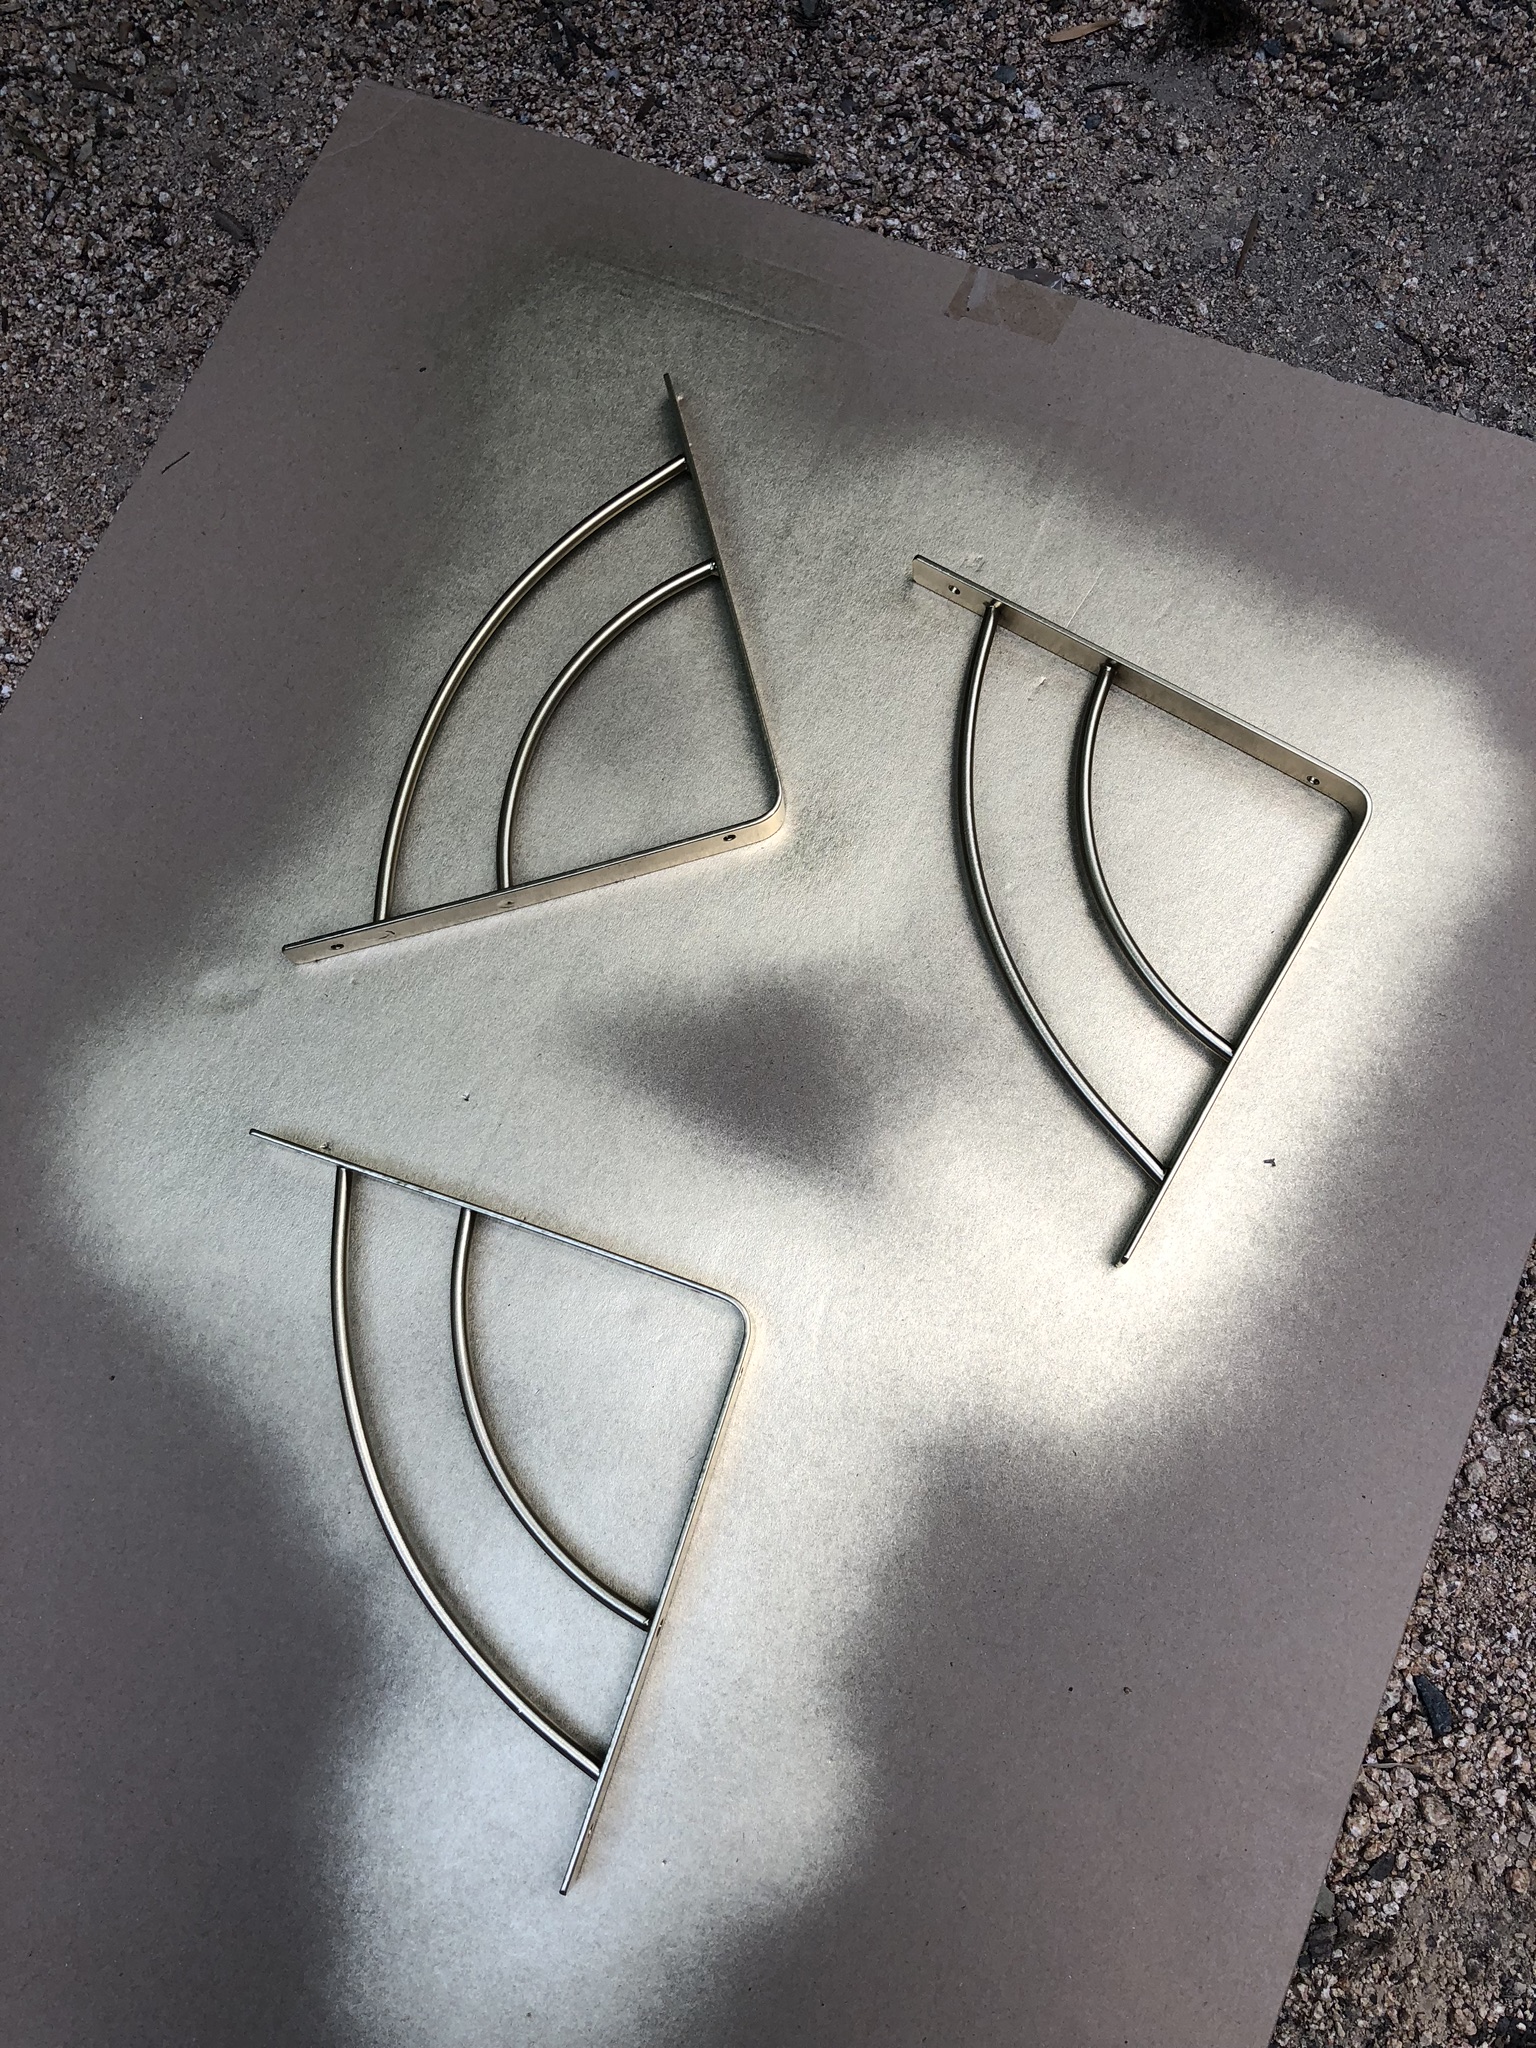
Once the countertop was in place, I spray painted $4 bronze brackets from Home Depot with gold paint so that they'd more or less disappear against the wall. And then to install the shelves, we used a stud finder, a level and a drill. Once you figure out where your studs are, it's just a matter of evenly spacing the brackets as best as possible and then making sure the shelf is level.


5. LIGHT FIXTURE: Previously a sad little bulb hung from the ceiling just waiting to be pulled out. And now a $15 little fixture from Amazon fills in the space just fine. It's simple and no-fuss and that's all we need. I added a gold chain and nicer white pull to my Amazon cart for a little extra polish.

6. DRYING RACK: When I found this bad boy on Amazon, I was sold. I love that it just tucks away in a corner that would otherwise be empty and then pulls out from the wall when it's needed. Because even small spaces deserve drying racks, amiright?!
7. DOG FOOD STORAGE: We've never been happy with our dog food storage situation and so this project gave us an excuse to rethink our options. The bottom drawer of the cabinet ended up being the perfect size for a single plastic bin of food. Our dog's food and water bowls sit just below.

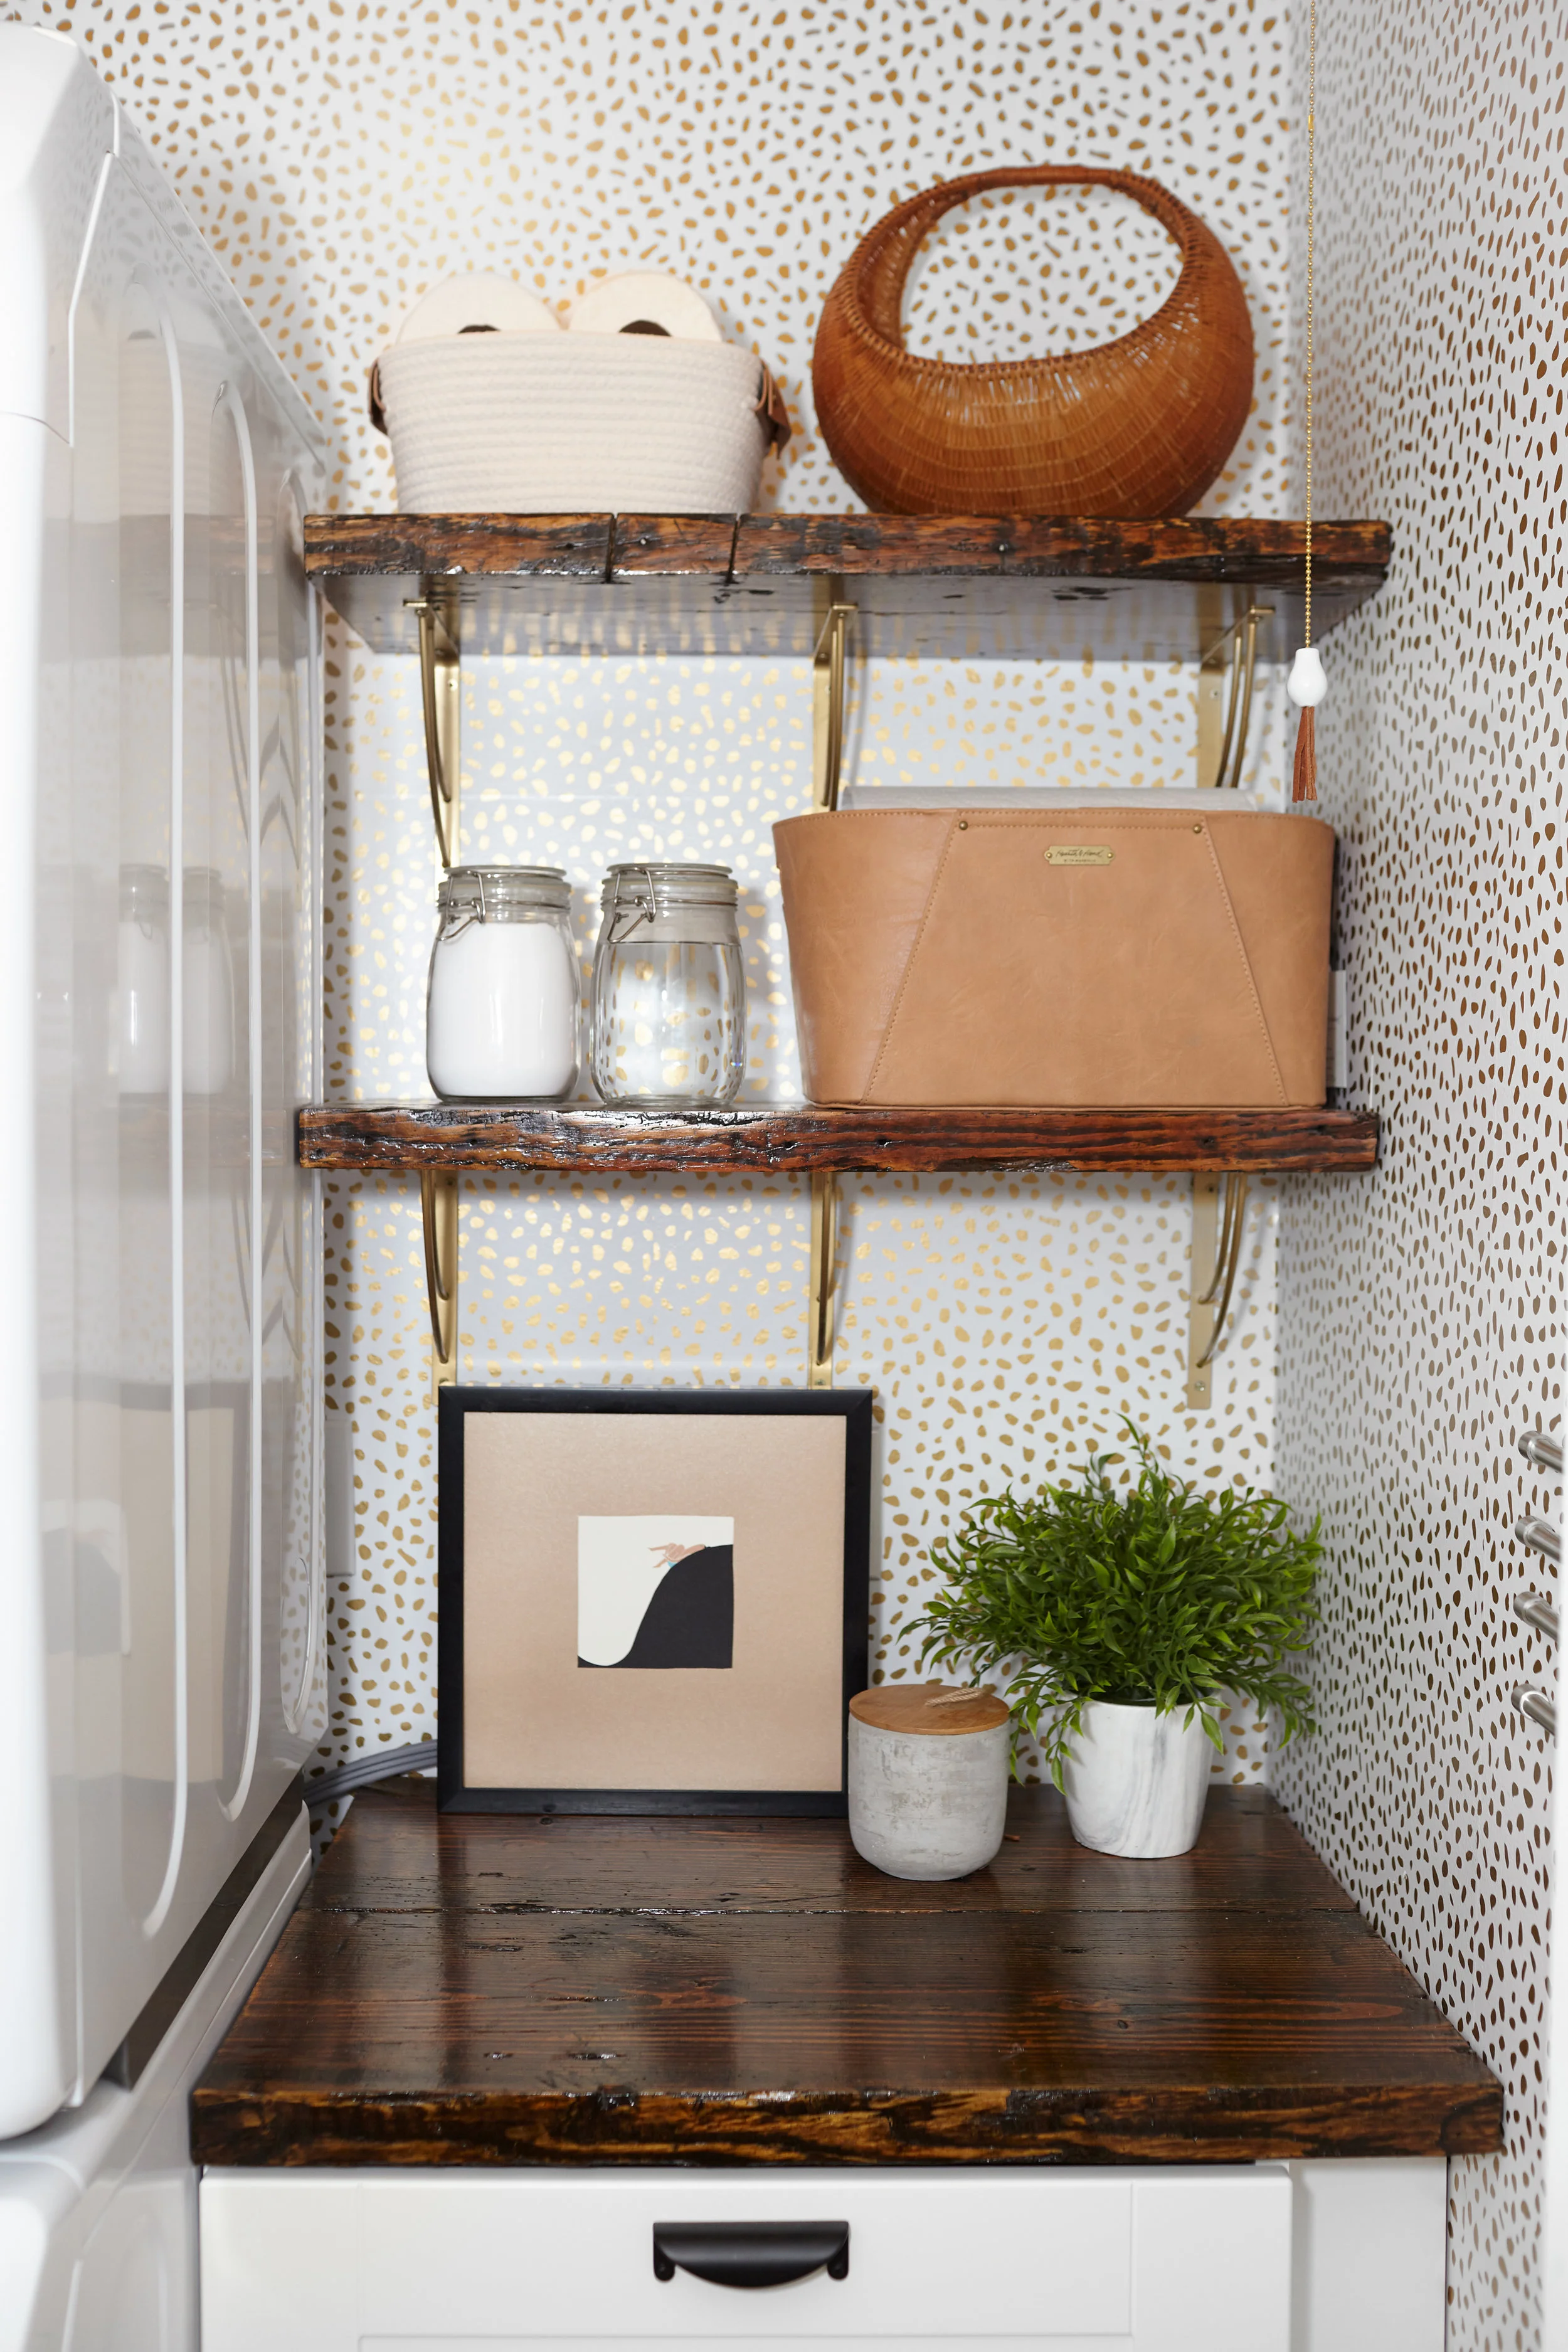
8. FINISHING TOUCHES: I picked up two baskets from Target—a small white rope one and a larger leather storage bin—to store paper towels and toilet paper. I tucked my sewing kit inside a vintage basket and poured baking soda and vinegar (we use them to cut odors) in glass jars. A candle, faux plant, and framed print by artist Laura Berger finish off the countertop with a bit of personality.